Salesforce App Setup
![]() Updated
by
PolicyMap
Updated
by
PolicyMap
PolicyMap for Salesforce: Installation instructions
- Install the package for Admins Only. This will install custom components, apps, and objects required to view and import PolicyMap data. It will also add two permission sets to your org: PolicyMap Admin and PolicyMap User. You will assign non-admins access to the application in the next step.
- Assign the permission sets.
- Choose which licensed users should manage PolicyMap data imports and assign the PolicyMap Admin permission to them. Because data imports require advanced permissions (Customize Application, Modify Metadata Through Metadata API Functions) and impact resource usage, we recommend assigning the PolicyMap Admin permission set to a single user with either the System Administrator profile or a clone of the System Administrator profile.
- All other licensed users should be given the PolicyMap User permission set. This will allow them to use PolicyMap data and components. In Setup > Quick Find Users, and select each user to give permission sets to. Select Permission Set Assignments > then Edit. Select PolicyMap User/Admin, then select Add, and Save.
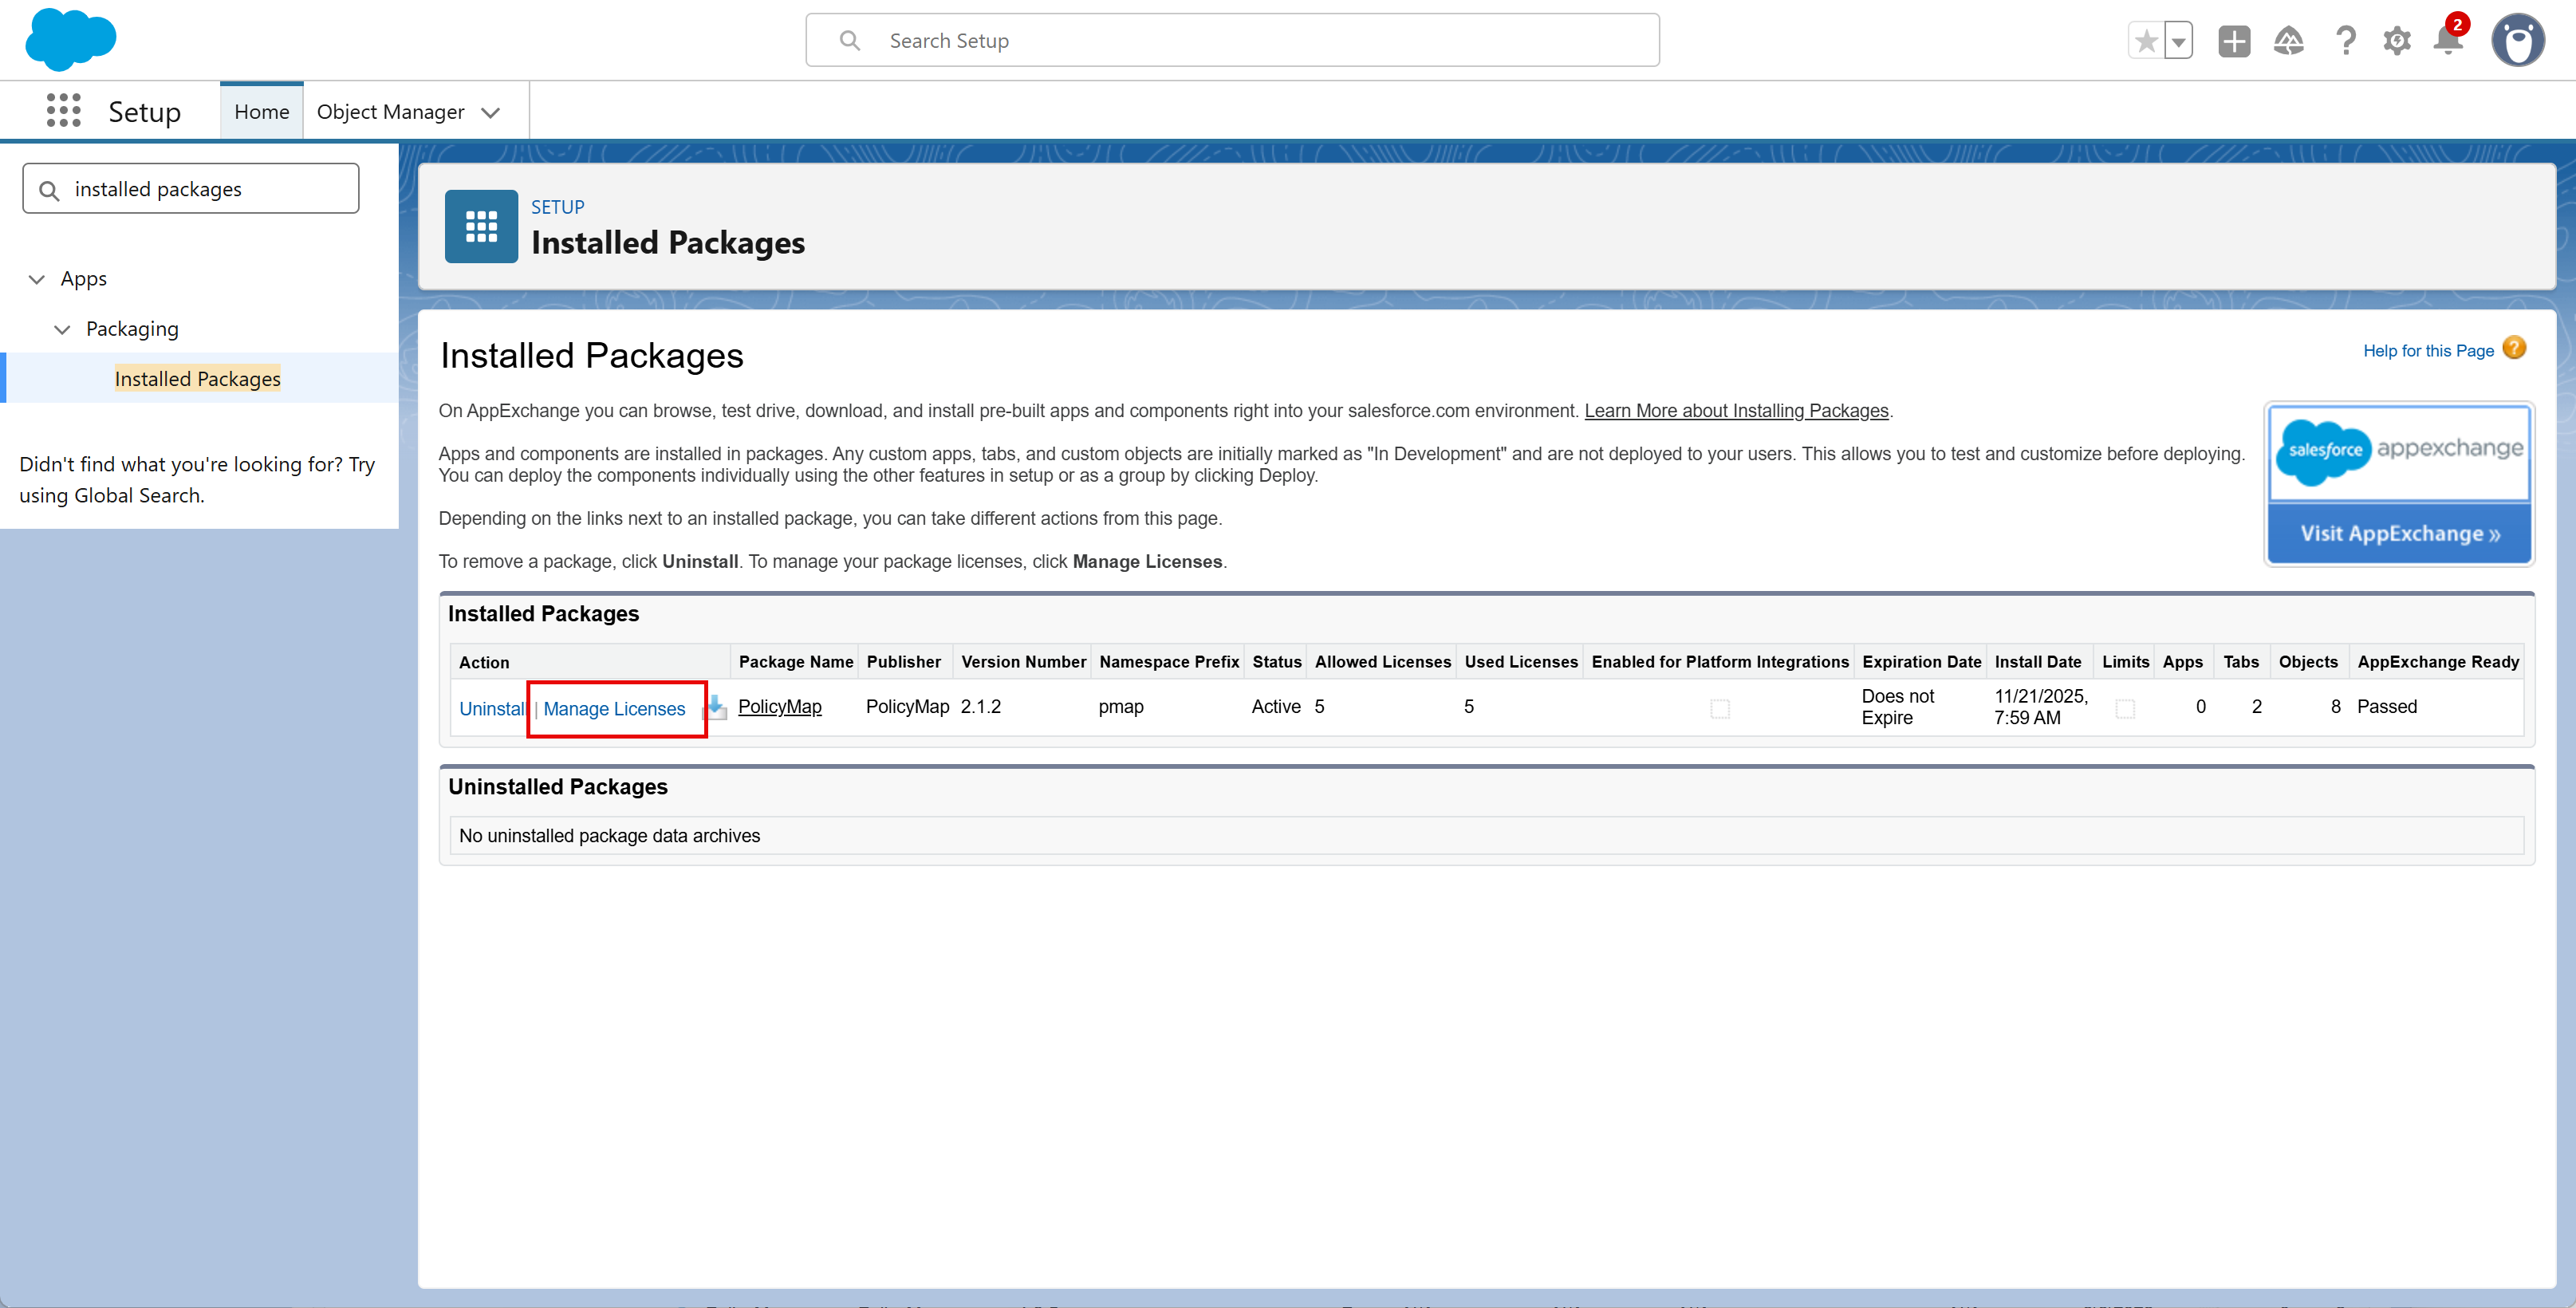
- Licenses also need to be set up under the Installed Package. In Setup > Quick Find Installed Packages, select PolicyMap, then Manage Licenses.
- Manage application access.
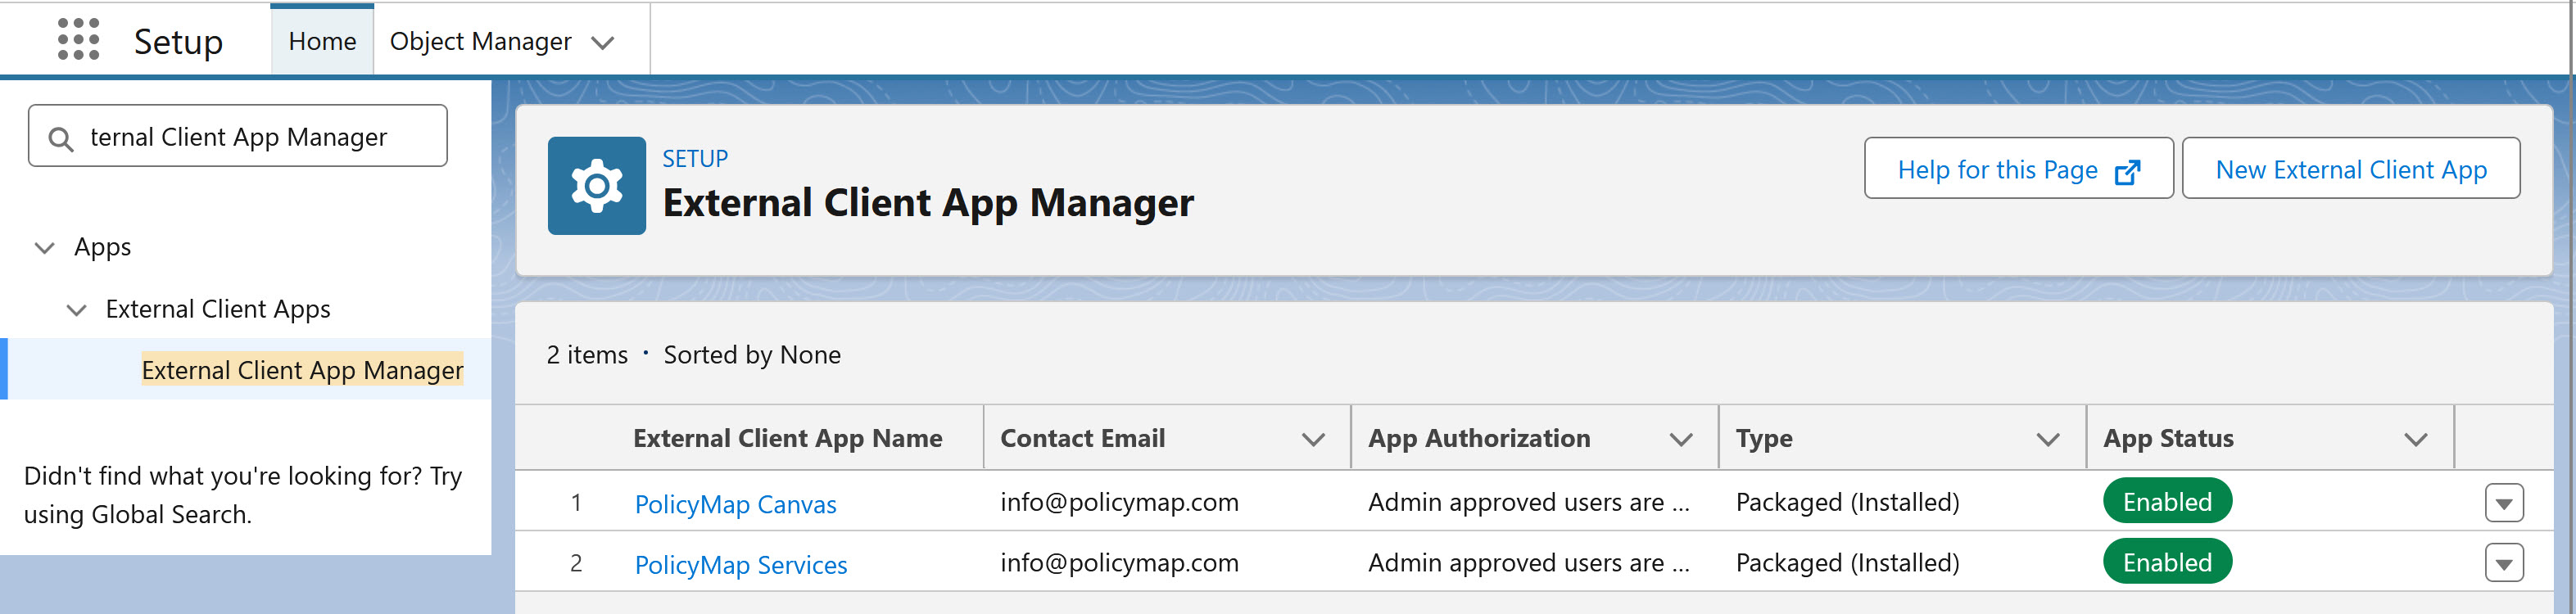
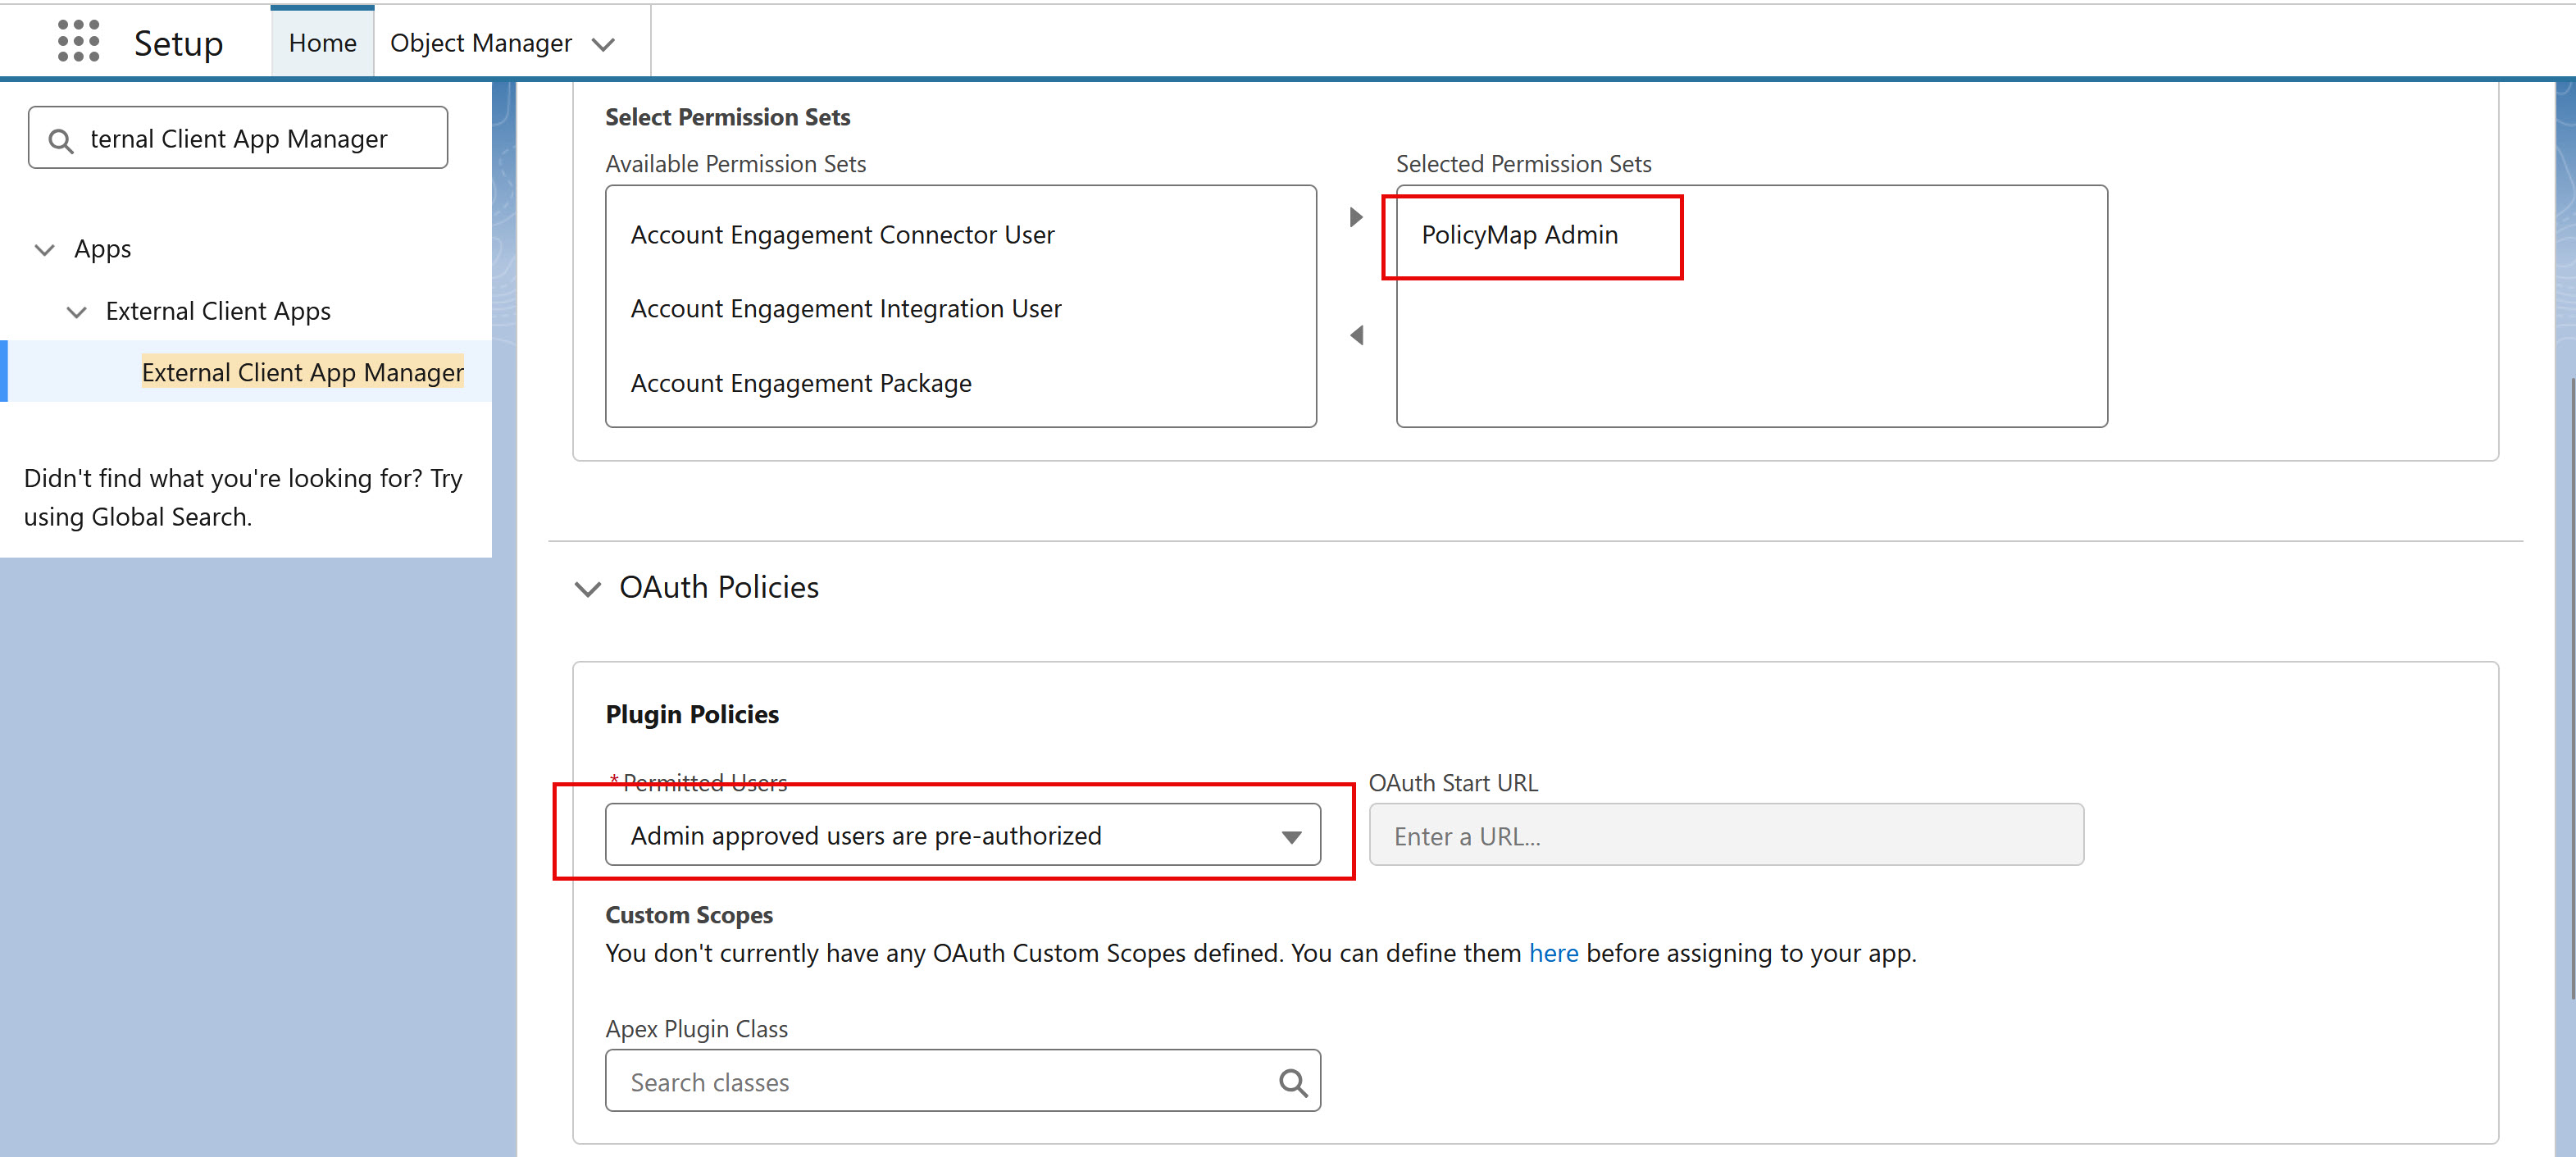
- Manage access to the PolicyMap Services app. From Setup, in the Quick Find box, enter External Client, and then select External Client App Manager.
- From the list, select PolicyMap Canvas, select Edit Policies.
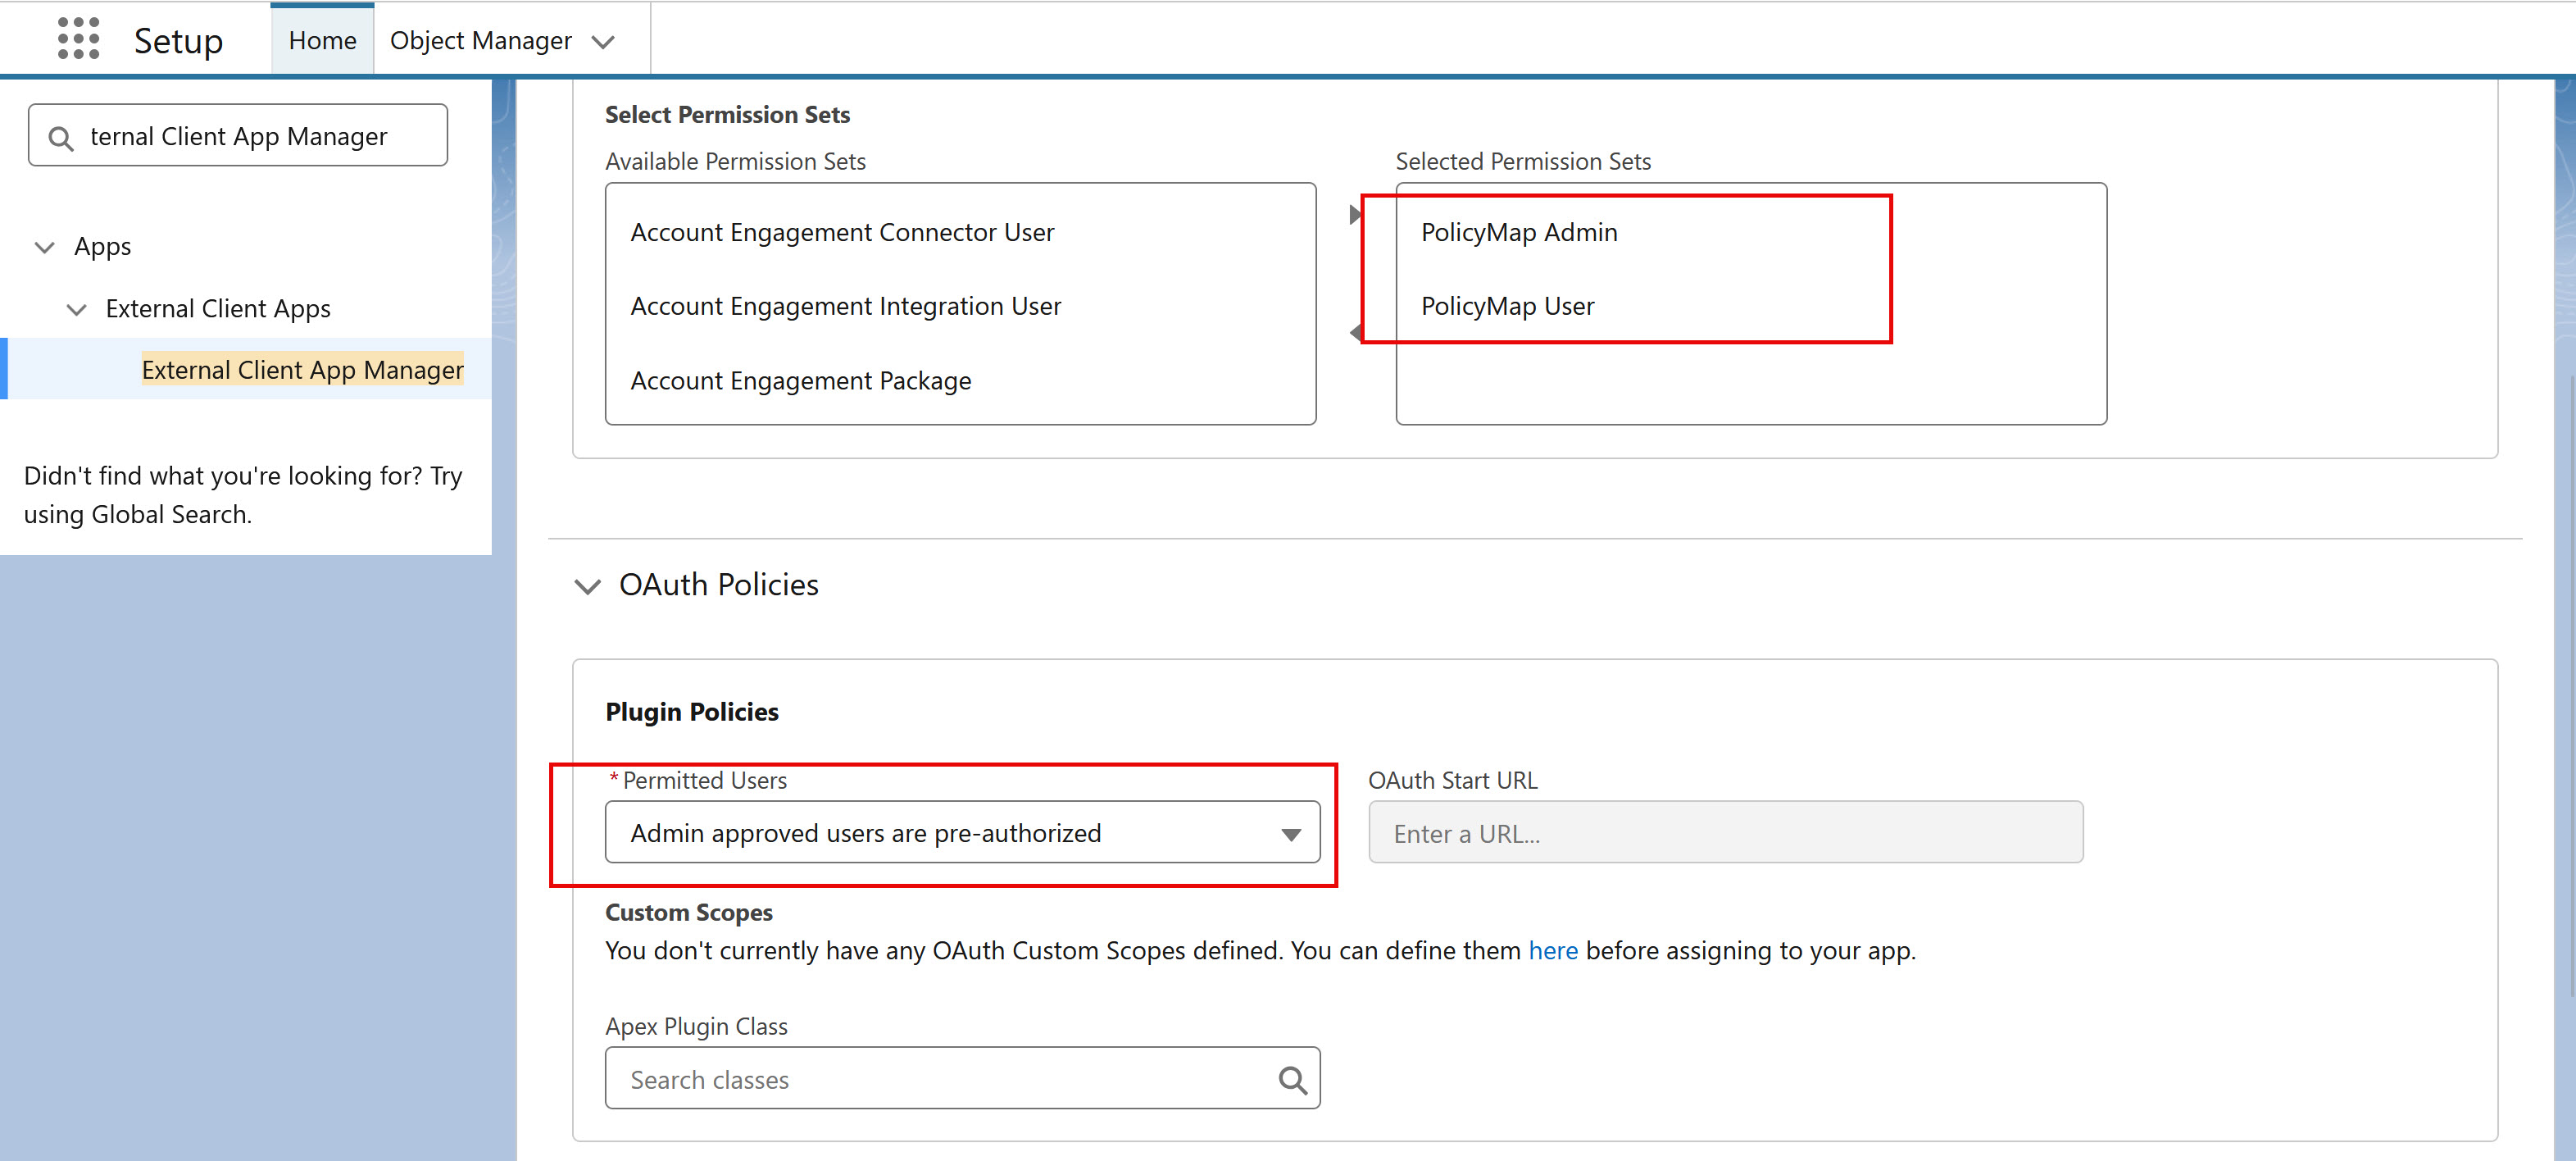
- Under Select Permission Sets, select and move PolicyMap User AND PolicyMap Admin to the right.
- Under OAuth Policies, from the Permitted Users dropdown, select Admin approved users are pre-authorized.
- Confirm the changes and save.
- From the list for PolicyMap Services, select Edit Policies.
- Under Select Permission Sets, select and move PolicyMap Admin to the right.
- Under OAuth policies, from the Permitted Users dropdown, select Admin approved users are pre-authorized.
- Confirm the change and save the policies.
- Manage access to the PolicyMap Services app. From Setup, in the Quick Find box, enter External Client, and then select External Client App Manager.
- Add PolicyMap components to your desired record pages.
- Add the PolicyMap Index Card component to the desired record page layouts. This displays the PolicyMap data associated with each single record location. Wide container preferred.
- On the desired page, select the
 gear icon, then Edit Page.
 - On the main Page, select Add Tab from the menu on the right. The default name will be Details. Select the new tab to edit the name. In the Tab Label, search for Custom and enter the display name for PolicyMap. We suggest PolicyMap Index Card.
- From the Components list, select and drag PolicyMap Index Card to the new tab.
- To view a record location on a small PolicyMap map, add the PolicyMap Locator component. Narrow container preferred.
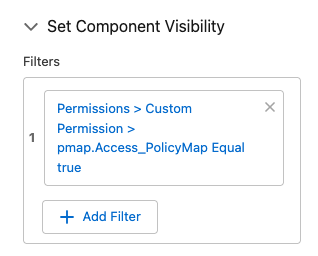
 IMPORTANT: Add a Component Visibility filter to all components (and component tabs) added to pages in the Lightning App Builder. The Custom Permission “Access_PolicyMap” must equal true. This ensures only PolicyMap users will see PolicyMap components.
- Select Add Filter, then Advanced, and then Field Select. From the menu, choose: Permissions > Custom Permissions > pmap.Access_PolicyMap.
- On the desired page, select the
- Add the PolicyMap Index Card component to the desired record page layouts. This displays the PolicyMap data associated with each single record location. Wide container preferred.
- Add the PolicyMap tab to app navigation. This tab navigates to the PolicyMap application page.
- Select the pencil icon in the top right.
- Select Add More Items, then choose All.
- Search for PolicyMap and add.
The PolicyMap Admin is visible only to Salesforce Admins and will appear automatically for them; it does not need to be added in this step.
- Complete setup. To configure the app, go to the PolicyMap Administration and Settings page. From the App Launcher, search for PolicyMap and choose PolicyMap Admin. From here, you can enable the app for specific objects, import data, monitor the status of import requests, and schedule regular geocode and data updates.