Data Loader
![]() Updated
by
PolicyMap
Updated
by
PolicyMap
The data loader allows users to load address-level data from a spreadsheet file to view in PolicyMap.
Be sure to read our tips on setting up your CSV data file for use in uploading. We know that all files can be different and all users will have different ways of storing data. Our tips are meant to help your data files load easily.
With your data file set up correctly and saved as a CSV file, you are ready to use the Data Loader. Log in to your PolicyMap account and click on the Data Loader icon ![]() at the top of the page. Follow these steps to set up and upload your dataset.
at the top of the page. Follow these steps to set up and upload your dataset.
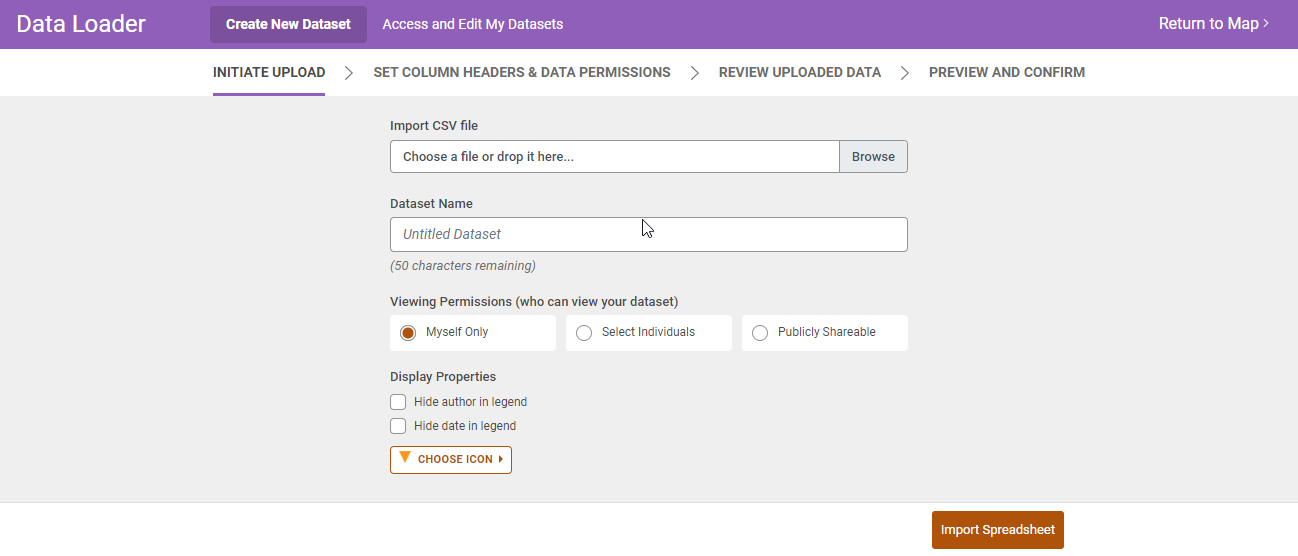
- Initiate Upload: Select your file and setup dataset.
- Import CSV File – Click within the box or the browse button to select the file to upload. The file name cannot exceed 128 characters.
- Dataset Name - Give your dataset a name. Please note, if you plan to share this dataset, this will be the visible name.
- Viewing Permissions - Select who will have access to this dataset. Myself Only means only your login will have access, while Select Individuals and Publicly Shareable will let others see your dataset.
- Display Properties - If you choose Selected Individuals or Publicly Shareable, you can hide your name as the author and when the dataset was uploaded.
- Set Column Headers & Data Permissions: Identify which fields to use for geocoding, and if shared, select which fields are visible.
- Confirm columns for geocoding – Confirm that these columns contain the information to locate an address. To successfully geocode an address, a file must contain columns named: Address, City, & State OR Address & Zip Code. If any of these fields are missing from this section, use the drop-down menu in the section below to re-identify.
- Confirm remaining columns - Confirm the type of data contained in each column. "$" symbols in the data will be recognized as currency when uploading. "%" symbols in the data will be recognized as percentages when uploading.
- Set column permissions - Set which columns will display based on user type. If Selected Individuals or Publicly Shareable were selected, users can pick and choose what data is shared.
- Review Uploaded Data: Review your uploaded dataset, edit or add any addresses, and save.
- Match Rate – The bold text will display the number of addresses found versus total uploaded. It is common for 70%-90% of addresses to be geocoded successfully.
- Edit an Address - Select the
 icon to open the address information to edit. Please note, any edits to the address fields will automatically geocode the address.
 - Delete - Use the
 icon to remove the address.
 - Headers - Select any header to resort the rows. Text fields will sort alphabetically and numerical fields by order, select the header again to sort in reverse.
- (Optional) Select field for label - Select which field will be displayed as labels on the map. If left blank, the tool will use the first column from your spreadsheet or first column listed after Longitude.
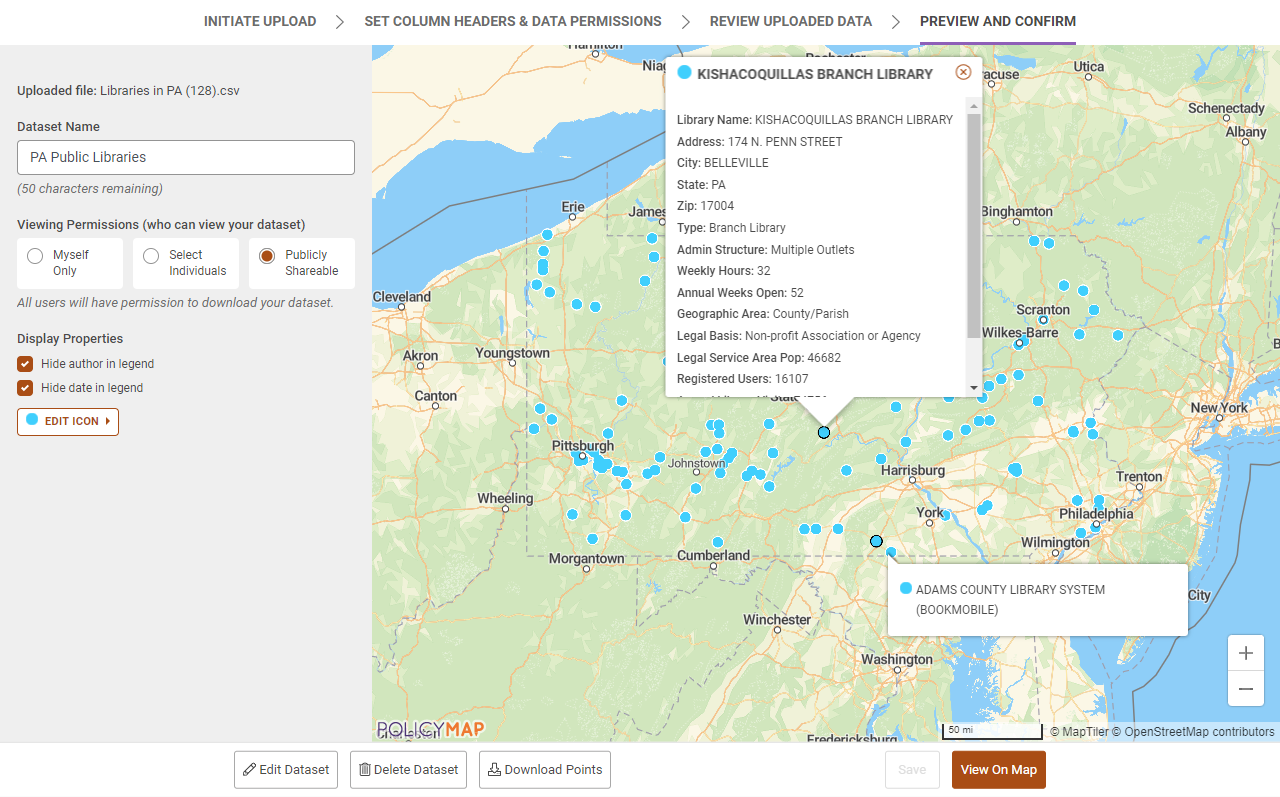
- Preview and Confirm: Confirm the dataset or make any changes. At any time, users can edit the dataset name, viewing permissions, display properties, or change icons. Use the buttons on the bottom of the Data Loader for additional features.


If you want to learn more about the function, you can attend one of our free online training sessions (select a date from our calendar here). If you have questions or need some additional help, please contact us at any time.